Showing posts with label crafts. Show all posts

Saturday, February 28, 2015

the 52 hand-lettered project.

I decided recently that I would participate in the 52 hand-lettered project on Instagram, as a challenge to myself. This year, I would really love to get my creative mojo back, and there really is no better way than to practice, practice, practice!

Armed with my gel ink pen (yep, that's it, really!), I am tackling this challenge head on!

Since I am starting late, here are weeks 1 through 7:


[ 1 | 52 ] my mantra for 2015
[ 2 | 52 ] summer love list
[ 3 | 52 ] one thing to do more often
[ 4 | 52 ] a summer memory
[ 5 | 52 ] places to visit
[ 6 | 52 ] a quote about love
[ 7 | 52 ] my everyday essentials

While I'm at it, I'm also hoping to up my photography game. I would love to be able to compose better images to share my work. I have discovered that my home has awful artificial lighting, and I tend to work at night, where that light is all I have.. so it has become a personal challenge to wake up earlier and take advantage of the soft morning light, or at least take photos in the afternoon when the sun is still shining.

Wednesday, February 25, 2015

my first commissioned work!

I recently had the opportunity to design a mug for my friend to gift to his girlfriend.

The verse he chose serves as a reminder of why she studies law (hint: because God is good!). It's such a sweet gesture  she's a lucky gal!


"Learn to do good; seek justice, correct oppression; bring justice to the fatherless, plead the widow's cause." Isaiah 1:17 (ESV)

The other side includes the verse reference.


So, friends, if you would like me to help you create something, please let me know! I love being creative, with a purpose.

Saturday, May 25, 2013

never stop creating.

At the beginning of the summer, I told myself that I would put crafting on a hold when I came to the castle. I mean, how could I possibly have time while abroad? I wasn't planning on bringing any supplies with me cause that would just take up unnecessary space, which it would. But of course, that didn't happen! I did not stop crafting and creating! I'm sticking with the simple while I'm here, but it's the simple and the basic that I love best. Making cards and prints, of course.

In no particular order..
But he said to me, “My grace is sufficient for you, for my power is made perfect in weakness.” Therefore I will boast all the more gladly of my weaknesses, so that the power of Christ may rest upon me. -2 Corinthians 12:9
We all need grace. For my roommate, Sarah!

For Jethro's birthday :)
In all fairness, I did the mug while I was in Kingston.. I didn't bring it with me abroad, haha. I made the card here and mailed it though!

A card for my mom, since I missed mother's day!

For Amy's birthday!

Sunday, April 28, 2013

end-of-the-year cards + gifts!

True to my style, the cards I have been making as of lately are simple. I have really enjoyed finding myself in cardmaking. In reverse chronological order, here are some cards I have made lately for various end-of-the-year purposes!

To the best co-CGL, ever.

To the best housemates, whom I will miss greatly!

To the craziest but loveliest DG girls, whom I love dearly!

 
Grad notebooks filled with notes and pictures to the grads in our CG - you are loved!


I don't seem to have a picture of the final product.. but here are the grad dinner invites before they were cut up! Rachel and I made these together and it was my first experience with invite/type design on the computer.. so much fun!


A generic birthday card that I gave to Angie for her 21st birthday! A simple design that I am sure I will reprise sometime.

Thursday, February 21, 2013

photos: cards

I love paper, and all things paper-related. Well, maybe not paper cuts, but I digress.

I love greeting cards and love to make them! But usually I am too lazy, or busy. My cards are not anything amazing (I have some friends who are amazing card makers.. I aspire to be them!!), but I love doing it, and hopefully my handmade cards will be something beautiful one day. Until then, here is a snapshot of some of the cards I have made in the last few months!


Jenna's birthday was way back in December, and this was the first card I had made in a long time that uses different materials/layers and isn't just drawn on (like the one below). As simple as it is, I thought it was SO BEAUTIFUL when I made it, haha.


My pastor and his wife celebrated their 25th anniversary around Christmastime, so our congregation got together to give them a Christmaversary present and card! This was the card, and the inside read: "Wishing you the best on your/the 25th" because it was their 25th anniversary, and Christmas is on the 25th!! So funny, right? It was all Jocelyn. I can take no credit.


Now, this card I had am amazing idea for it way back when and got really excited but had to hold tight because I know that Rosemarie reads my blog.. eep. I was so hyped up about the card itself, I had no idea what to write on/in it. So I'm not a big fan of how I wrote "Happy 20th Birthday Rosemarie" on the front, but oh well. (Oh, and she's a mountain climber, hence the mountain)


My housemate, Angela's birthday was recently too! I really really like how the individual lettering turned out. It looks fab, but cutting out the tiny letters took waaay longer than any of my other cards. But hard work always pays off, right?

That's it for the time being! If I make any other cool cards, I'll be sure to share them too.

Monday, January 14, 2013

holiday bells.

Over the Christmas break, I decided to try some new things and make some of the crafts that I had been intending to try for the longest time. I really enjoy decorating, and crafting. It is lots of fun! I made fun birthday banners for my housemates on their birthdays, and for my Christmas party I made holiday bells/hanging garlands/not sure what to call them, hehhh.

Oh Happy Day is quickly becoming my favourite blog for various DIYs. Many of my favourite ideas come from that blog, and many of the things I want to try, but am not sure if I will ever get the chance to (pop-up dinners around the city!!). There are very few things I don't *love* on that blog! Needless to say, this idea is from Oh Happy Day.


The original post is here. I made various sized bells and added gift bows that I bought from Wal-Mart. Super super simple, yet added such a colourful addition to my Christmassy kitchen decorations.

Here are Nicole and Jocelyn modelling for me! Beautiful!

Yes, I also used photobooth props from Oh Happy Day. I told you I love that blog.


It was a very craftful evening, and I assure you that everything was very easy and do-able! This is a very late Christmas craft, but it could be used to decorate for pretty much any kind of party. It's so colourful and fun!

Sunday, December 02, 2012

two.

Sunday 2: Make a handmade Christmas card
I decided to go handmade with my cards this year.. it's a lot more effort but a lot more fun! Here is one of many. More work to come!


Rejoice in the Lord always; again I will say, rejoice. -Philippians 4:4
Saturday 1: What is the significance of Christmas to you?
Sunday 2: Make a handmade Christmas card

Monday 3: Share from devotions
Tuesday 4: Take a picture of your city dressed up for Christmas
Wednesday 5: Go to the library
Thursday 6: Share from devotions
Friday 7: Treat self to a Starbucks holiday drink
Saturday 8: Write a letter to Santa!
Sunday 9: Share a cup of peppermint hot chocolate with a friend
Monday 10: Share from devotions
Tuesday 11: Share your favourite Christmas movie
Wednesday 12: Favourite Christmas song, why?
Thursday 13: Share from devotions
Friday 14: Do sit-ups for the length of a Christmas song
Saturday 15: Bake Christmas cookies
Sunday 16: Go to the gym, relax and de-stress
Monday 17: Share from devotions
Tuesday 18: Favourite childhood Christmas memory
Wednesday 19: Spend time at the campus coffeeshop
Thursday 20: Share from devotions
Friday 21: Movie night
Saturday 22: Cook a meal for the family
Sunday 23: Celebrate Christmas with close friends
Monday 24: Family festivities
Tuesday 25: Christmas Day

Monday, September 17, 2012

DIY: the creative process.

I recently did a few paintings and I wanted to share with you the creative process I take to get there. I'll use this painting as an example.


First, to get inspiration, I look everyone on the internet. I got the ideas for this particular project on pinterest, and from the facebook page of one of my favourite blogs, a cup of jo.


Once I figured out what I wanted to create, I made a plan. What did I think my final project would look like?


As you can tell, my plan looks a little different from my final product. First of all, I didn't recreate the different coloured painting effect in my plan (just wasn't worth the effort), but also my quote ended up being too long for my canvas, which was a-okay! It's better this way.. less words, therefore simpler! And we all know what a big fan I am of simple!

This is generally how I create most of my crafts. I start with a concept, pulled from inspiration from the internet. Then I create a plan.. and hope for the best! Sometimes it's better to stick to a craft with great instructions, but when you create something of your own... well you can truly call it your own.

I guess the biggest thing I learned from this was to have a plan so I know which direction I'm heading, but to be willing to change the plan if need be. Be prepared, but be flexible!

Happy crafting!

Monday, September 10, 2012

DIY: revealed quote painting

It was raining over the weekend, so I painted 2 different paintings (check out the first one I did!).


This painting is very simple in concept, but a little longer in terms of steps. First take your colours (whichever colours you'd like.. I chose green, blue and grey) and paint them along your canvas, covering the surface. I left some of the canvas exposed.


Using removeable vinyl letters, place your words on the canvas. I put them onto a piece of painter's tape first, so I could arrange the letters before placing them on the canvas. This worked out well for me since the word 'Everything' was a little longer than I had expected. Having the flexibility of moving the letters was very helpful.


I removed the tape, and put the letters right on the canvas, exactly where I wanted the words to show up, and taped a herringbone pattern on the canvas as well.


Using white, I painted over everything, making sure no edges were lifting up, covering the entire canvas!


Lift up the tape and the vinyl letters to reveal the final product. Wow!


Here are the two paintings I did. It only took me a morning, not very long at all. I hope you enjoyed following the process! Painting was a lot of fun.

Saturday, September 08, 2012

DIY: geometric art

For my 19th birthday, Rosemarie got me the BEST PRESENT EVERRRR. She gave me all the materials I needed for something I pinned on pinterest: canvas, paint, tape, brushes.. all of it. Makes my life so easy! {I am now 20, so she gave this to me not this past summer, but two summers ago..!} I pin lots of craft projects on Pinterest, with the best intentions. They are there as inspiration for an art project that I will attempt.. some time.. in the near far future. I just finished doing two of the simplest paintings ever, using 2 of the 4 canvasses Rosemarie gave me (I will show you the first now, the other later). Man, I'm slow! Anyway, onto the art.


This painting was super simple, and doesn't require many steps. It is simply this. First, cut thin strips of tape, and tape them across your canvas all over the place. Start with one paint colour and paint some areas. I used grey as an accent colour (much like the original pin), so I only painted a few of the shapes grey.


Paint the rest of it a different colour (blue blue blue!)


...and peel the tape! This is the funnest part!


Wasn't that simple? Rose gave me all that I needed and it took me this long to do. Um, I fail.

Friday, July 20, 2012

canada day cake.

Both Canada and the United States celebrate their national holidays over the same weekend, with Canada Day falling on July 1st, and Independence Day or the fourth of July being on, well, July 4th. There is a wealth of patriotic American themed crafts, prints, food, etc. but very little Canadian content!!


And so, here is a long overdue Canada Day cake. Red velvet, creamcheese frosting and strawberries. Mmm mmm, good!


I kept forgetting to post this (I blame Bluesfest), but here it is at long last! When my friends came up that Canada Day weekend, we made this cake to celebrate.


Happy (waaaay belated) Canada Day!

Wednesday, June 13, 2012

DIY: decorated phone case.

I got a new phone a while ago, and tried looking far and wide for a phone case that was at the same time protective, durable, pretty and affordable. But apparently, no such case exists for the iPhone 3 because it is so old.

My best options became a white hard case, or a black hard case. They were a little plain for my liking, so I got the white case and made a promise to myself that I would decorate it.. and that I did!


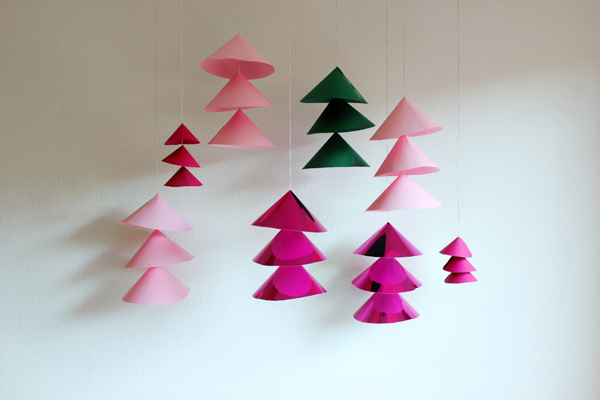
The hardest part was deciding how to decorate it. Many ideas later, I decided to copy this onto my phone, in mini version.

Materials: phone case, coloured nail polish, makeup sponge (or paper towel, or any other sponge), clear nail polish, tape, scissors.

I cut my tape into thin strips (though I would probably do thinner if I were to do this again, simply because the "canvas" is smaller than most) and arranged them in any kind of interlinked pattern.

I experimented with the painting process, and found that what worked best was to paint the coloured nail polish onto the tape, and then dab at it with the makeup sponge to spread it around the body of the case. If you put the colour right onto the case and then dab it, the spot where you originally put the nail polish will be a lighter coloured spot.


The case dries really quickly, since there is actually really little nail polish on it. Once it's dry, remove the tape and repeat the same process with the clear nail polish. I painted the nail polish straight onto the sponge and dabbed it all over the case. (Note: if your case, like mine, separates into two parts, take the case apart before painting the edges that would connect or else you might accidentally glue your case together)


Easy, beautiful, and done!

Monday, December 05, 2011

DIY: paper napkin wreath.

For my 4th day of my Christmas Countdown, I made a paper napkin wreath. It was super simple to make, and used all materials I already had on hand! I had lots of leftover napkins from my flower tree earlier this year.

There were no tutorials online that I liked, so I made my own very simple wreath.

First I taped some pieces of paper together to create a base, and I drew a large circle and a smaller circle to create the shape of my wreath. I just drew them freehand because it isn't important how perfect the circles are since the napkins will stick out every which way anyway.

I cut off the corners of my paper, but left the middle in because the door I was putting my wreath on is also white. But if your door isn't, you might want to cut out the middle part.

I then grabbed a napkin and bunched it up from the middle, and taped it to the wreath with the bunched part facing the inner circle. I continued this and filled the entire wreath. I did two layers to give the wreath more depth.

To hide the taped up bunched bits, I took a napkin and rolled it into a donut shape and taped it on top of all the exposed parts.

And ta-da! A wreath! It's pretty lightweight, so I just taped it to my door, and it is holding fine. Otherwise you could hang it like any other wreath too.

21 days until christmas!

I forgot to post yesterday.. but here is my decorated door, as well as a link to instructions for my paper napkin wreath!

I'll keep this short and sweet. I love winter wreaths, I didn't want to spend more money, I had napkins left over from my flower tree I made earlier this year, so the logical solution was to make my own wreath! No tutorials I found online satisfied me so I just made it up on my own. It wasn't hard to figure out. {instructions here}


That's my completed door with the baubles hanging from the top too. An easy and fun break from studying and working!

Saturday, October 01, 2011

flowery-tree wall decoration

I am slowly decorating my room, and I finally have a new part to share! The last thing I shared was my jewellery organizer which was more utility than decoration, but still looks nice nonetheless.

I now have a purely-for-decoration tree on my wall! It's beautiful!


Do you remember the napkin flowers I made earlier this summer? Well here they are being used for their original intent.

I created my tree out of bristol board pieces, and attached them to the wall. I'm a big fan of non-permanence, just in case I want to redecorate at any point. Bristol board is much more hassle free than paint (not to mention very cheap). Then I put my flowers on the wall to pull everything together. They (sort of) match my bed, see?


The great thing about the flowers is that I was able to also cover up parts of the bristol board where you could see two different pieces being attached.

Finally, my empty wall is not so empty anymore!

Sunday, September 18, 2011

cake plate.

I love the easy DIYs that exist in life. I do so many easy DIYs in life, that I'm sometimes ashamed to call myself a DIYer. Does it really count, if all you did was buy materials and put it together? There was no creativity involved! But I guess you can say that about all crafts.. you simply "buy the parts and put it together".

I made a cake plate to put Henrietta's cake on. I don't know if it qualifies as a true DIY, but it sure is cheaper (and easier to find) than a real cake plate! The good news is that you can use whatever materials at all. It really doesn't matter!


All you need is something for the stand, and something to hold the cake. I used a cup for the stand, and a tray for the cake. You can use anything from a candleholder, to a wine goblet, to a cup for the stand. And you can use trays, bowls, plates, or whatever shape and size of dish that pleases you for the top.

It's seriously the easiest thing in the world.

Cake Plate

Materials:
● Cup/candlestick holder/wine glass for stand
● Plate/bowl/tray
● Super glue/epoxy

1. Grab your two pieces, apply glue to one side and attach in the middle of your dish! Ta-da! Was that not the easiest thing in the world?

You can even make it multi-tiered for a cupcake stand if you want! If you were feeling extra crafty, you could spraypaint your entire creation to create a more unified look. I left my spraypaint at home in Ottawa, but it would really make for a nice touch to paint the cake plate.

Thursday, September 15, 2011

DIY: jewellery organizer

One of my big goals this summer was to either fork up the money to buy a cute and functional jewellery organizer, or just make one myself. All the ones I had seen in shops cost upwards of $30, and the ones I had seen online required tools I did not own, or were way too complicated and time consuming. I knew I had to find the easiest craft possible.. and it was an endless hunt.

It wasn't until this summer when I was in Saint John, at a cute little craft/jewellery market and I saw one of the ladies selling her earrings off a kitchen tray with a drawer liner instead of the actual tray part. It was so cute! Anyway, I kind of had an idea for what I wanted to make for the longest time, but I didn't know what to use as a backing (I'm thinking that this will make more sense once I post pictures). Everything I had read online said to use chicken wire, but I thought that was ridiculous! The holes are huuuuge!! How does that make any sense?!

Anyway I finally figured out a cheap organizer for earrings and necklaces. It's a two part thing but only cost me $5 for the necklace organizer, and about $15 for the earring organizer. I definitely didn't put much time into frame shopping, but you can definitely find a cheap frame somewhere (Salvation Army?) to use instead.


Jewellery Organizer

Materials
Earring Organizer:
● Frame
● Drawer liner
● Tape/staples/glue

Necklace Organizer:
Rail
S-hooks

Instructions
Earring Organizer:
  1. Take the frame, and place on drawer liner to measure size of liner. Since I taped the liner to the mat that was provided with my frame, I made the liner about an inch wider than the hole in the mat, on each side. If you are stapling or gluing the liner to the frame, then I would suggest only leaving about half an inch extra on each side.
  2. Attach the liner to the inside of the frame. Make sure you hide the edges so that they aren't sticking out.
  3. Hang/prop up the frame. You can either hang the frame to the wall (I did this to save space in my room, I don't have that much table top space, and this is definitely a big space saver for me.. my earrings used to take up a good half of my dresser top!), or you can also put it on a stand and display it proudly that way too. If you prop it up, then you can also use the organizer for studs. Right now my studs are in a box on my dresser, but they take up a lot less space than if all my hanging earrings were there too.
Necklace Organizer:
  1. Attach rail to wall, and hang hooks Um, that's it. Seriously. It's so simple. My initial idea was to put this on top of my frame to create a curtain effect, but I decided against this to avoid clutter. But seriously, this is so simple and you can hang all sorts of things off the hooks, and the rail. I currently have purses hanging neck to my necklaces right now.
This whole project was so simple, cost me about $20, is way more functional than anything I've seen in stores, and it took me under 30 minutes to complete.

I have this set up in my apartment in Kingston, and I might just have to get one up in my home in Ottawa too! I am so proud of this creation, and I will definitely be showing it off to all my friends who visit me!

Here's the final product: